Easy Crochet Fabric Bowl: Step-by-Step Beginner Pattern
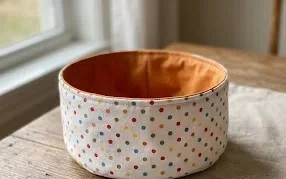
A shallow bowl crocheted from cotton fabric strips feels sturdy in your hands, with a softly ridged surface and sides that hold their shape. It can corral yarn scraps beside your chair, keep keys near the door, or add a handmade touch to a shelf. Beginners can follow the simple single-crochet stitches, while experienced makers can enjoy turning leftover fabric into something useful. The satisfying part is watching a flat, round base grow into a small bowl as the stitches rise around its edge. In this pattern, you’ll learn how to make and join fabric yarn, work the base in rounds, and shape the sides without letting them flare. A few changes in strip width or color give each bowl its own look.
Why You’ll Love This Pattern
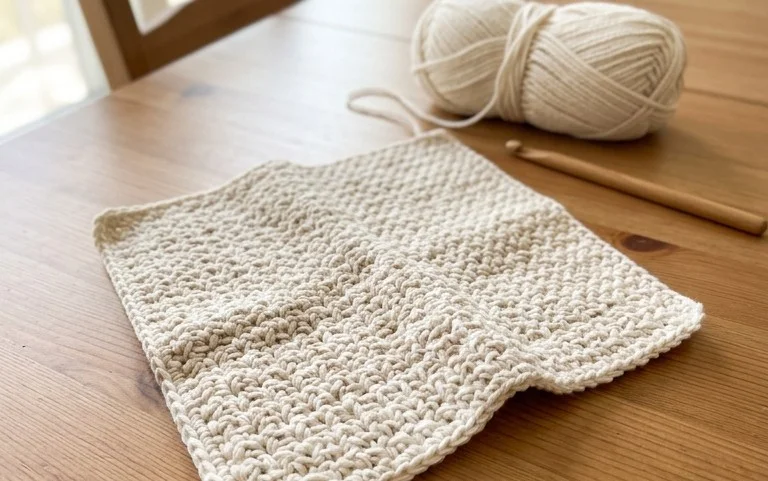
Worsted cotton makes a firm, absorbent dishcloth with a simple square shape and a lightly ridged texture. This beginner project uses single crochet from edge to edge, so you can focus on keeping your sides straight and your stitches even.
The cloth takes about two to three hours, depending on your pace, and uses less than one skein of yarn. Its small size makes it useful for practicing consistent tension before starting a larger project. A pair tied with cotton yarn also makes a practical handmade gift.
The rows were easy to follow, and the cotton made a sturdy cloth that kept its shape after washing.
— June, illustrative maker note
Pattern Overview & Skill Level
- Skill Level: Beginner. You need to make a chain and work single crochet.
- Approximate Time: Two to three hours, including weaving in the ends.
- Construction: A flat rectangle worked back and forth in rows. Each row is made in single crochet, with a turning chain that does not count as a stitch.
- Finished Dimensions & Sizing: About 7.5 × 6.75 inches (19 × 17 cm), after washing and drying flat. The final size can vary slightly with tension.
Materials & Supplies Needed
- Yarn: About 75 yards of worsted-weight (#4) 100% cotton yarn in one color. Cotton absorbs water and tolerates frequent washing. A smooth, tightly spun yarn makes it easier to see and count the stitches.
- Hook: 5.0 mm (US H-8) crochet hook. If your fabric feels stiff, try a 5.5 mm (US I-9) hook; if the stitches look loose and open, try a 4.5 mm (US 7) hook. Changing the hook may change the finished dimensions and yardage.
- Notions: Tapestry needle for weaving in the yarn ends, scissors, and a ruler or tape measure. A stitch marker is optional for marking the first stitch of a row.
- Substitutions: You can use another worsted cotton or a cotton-linen blend, but check the care label before substituting. Acrylic is less absorbent and may feel warmer or stretchier when wet. A different yarn weight changes the cloth’s size and texture, so make a small gauge swatch and expect to adjust the finished dimensions.
Stitch Guide & Abbreviations (US Terms)
- ch = chain.
- sc = single crochet.
- st = stitch.
- sts = stitches.
- rep = repeat.
- Gauge = 16 sc and 18 rows measure about 4 inches (10 cm) square, unstretched. Use this as a guide; matching the gauge helps the cloth reach the listed size.
To make a single crochet, insert the hook into the stitch, yarn over and pull up a loop, then yarn over and pull through both loops. The turning chain at the start of each row does not count as a stitch in this pattern.
Step-by-Step Pattern Instructions
Dishcloth
Make the starting chain loosely enough that the first row does not pull inward. The pattern is worked flat, turning after each row. Count the stitches before moving to the next row; each row has 30 sc.
- Row 1: Ch 31. Sc in the second ch from the hook and in each ch across. Turn. (30 sts)
- Row 2: Ch 1, sc in each st across. Turn. (30 sts)
- Rows 3–10: Rep Row 2 eight times. (30 sts in each row)
- Rows 11–20: Rep Row 2 ten times. (30 sts in each row)
- Rows 21–30: Rep Row 2 ten times. (30 sts in each row)
Finishing
After Row 30, fasten off, leaving a tail about 6 inches (15 cm) long. Pull the tail through the last loop. Thread it onto a tapestry needle and weave it through several stitches on the wrong side, then change direction and weave through a few more stitches to secure it. Weave in the starting tail the same way. Do not pull the tails so tightly that the edge puckers.
Lay the cloth flat and check that the corners are square. If the sides have drawn in or curled, wash and reshape the cloth before measuring. This pattern has no separate border, so keep the turning chain and first and last stitches consistent for a neat edge.
Care & Washing Instructions
- Wash cotton in a machine or by hand with warm water, up to 40°C (104°F), unless the yarn label gives a lower limit.
- Dry flat or tumble dry on low if the yarn label permits; reshape the cloth while it is damp.
- Block lightly by smoothing the damp fabric into a rectangle. Follow the yarn label for any fiber blend or special care directions.
Pro Tips & Common Mistakes to Avoid
- Keep the edges relaxed: A tight starting chain can make the bottom edge narrower than the rest of the cloth. If that happens often, use a hook half a size larger for the chain only, then switch to the pattern hook for Row 1.
- Count each row: Check for 30 stitches before turning. If you miss the final stitch, the cloth will gradually taper; if you add a stitch in the turning chain, it will widen. Place a marker in the first stitch of a row if the edge is hard to see.
- Secure the ends well: Weave each tail through stitches on the wrong side, change direction once, and avoid cutting it right at the fabric. This helps the ends stay put through repeated washing.
- Plan size changes: For a wider cloth, add chains to the starting chain, then work one fewer sc than the chain count. For extra length, add rows. Both changes use more yarn; a cloth made wider and longer can need substantially more than the listed 75 yards.
Frequently Asked Questions
Can I use acrylic yarn instead of cotton?
You can, but acrylic absorbs less water and may feel less suitable for wiping dishes. It can also stretch differently when wet. Make a small swatch and wash it before choosing acrylic for a cloth you plan to use often.
How do I make the dishcloth larger or smaller?
Change the starting chain to adjust the width, keeping one fewer sc than the number of chains. Add or remove rows to change the length. Measure your work as you go, since a different yarn or hook can alter the finished size.
Is this pattern suitable for a first crochet project?
Yes. It uses only chains and single crochet, with no shaping, color changes, or special edging. The main challenge is counting 30 stitches consistently and working into the first and last stitch of each row.
May I sell dishcloths made from this pattern?
Check the designer’s terms before selling finished items, and follow any credit or product-listing requirements they give. If you are using a pattern with no stated terms, ask the designer rather than assuming commercial use is allowed.
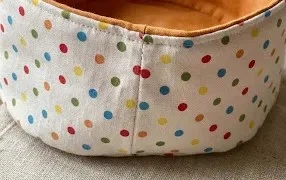
Your finished bowl has a sturdy base, softly textured sides, and a useful spot in the home, all made from fabric that might otherwise sit unused. For a simple variation, alternate two fabric colors every few rounds, or make the base a little wider for a larger catchall. If you make one, share a photo on Pinterest or your favorite social media page; it’s always nice to see how different fabrics shape up. You can also explore more free crochet patterns on the blog for another practical project to make with your hook and leftover materials. Keep the bowl dry between uses if you fill it with items that could mark the fabric.