Easy Little Star Crochet Coaster: Free Beginner Pattern
A stack of these handmade coasters brings a soft, textured touch to your coffee table while keeping surfaces free of water rings. These small circles feel firm and sturdy in the hand because of the tightly worked stitches, making them a reliable housewarming gift for friends or a quick addition to your own living room. You will learn how to maintain even tension while working in continuous rounds, a technique that prevents your fabric from curling at the edges. This project is a great way to use up those lonely balls of cotton yarn sitting in your craft basket, ensuring nothing goes to waste while you finish a useful item in under twenty minutes.
Why You’ll Love This Pattern
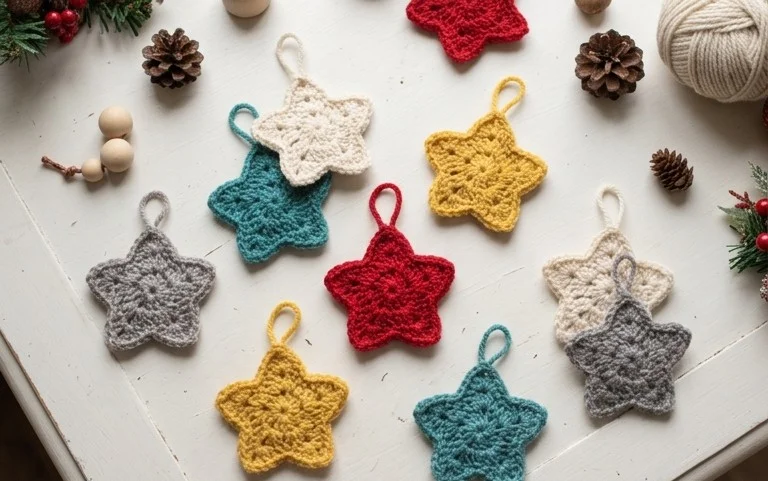
This beginner-friendly crochet coaster pattern provides a practical way to protect your furniture while practicing fundamental stitch techniques. The design works up in under twenty minutes, making it an ideal choice for using up small amounts of leftover cotton yarn from larger projects. Its compact size ensures it remains portable for crafting on the go, while the circular construction creates a dense, absorbent fabric that lays perfectly flat on any surface. Because the pattern relies on basic increases, it is a low-stress project that allows for consistent rhythm and tension building.
I managed to whip up a set of four coasters in a single afternoon using scraps I had lying around. The instructions were easy to follow and they look great on my coffee table.
— Sarah, casual crafter
Pattern Overview & Skill Level
- Skill Level: Beginner
- Approximate Time: 15–20 minutes per coaster
- Construction: Worked in continuous rounds from the center outward
- Finished Dimensions: Approximately 4 inches in diameter
Materials & Supplies Needed
- Yarn: Worsted weight #4, 100% cotton, approximately 15 yards per coaster. Cotton is preferred for its absorbency and heat resistance.
- Hook Size: 5.0 mm (US H-8) crochet hook.
- Notions: Yarn needle for weaving ends, stitch marker to track the start of rounds.
- Safe Yarn Substitutions: Acrylic yarn may be substituted but will be less absorbent and may melt if used with very hot mugs. Wool yarn provides a natural look but requires hand-washing to prevent felting.
Stitch Guide & Abbreviations (US Terms)
- MR: Magic Ring
- ch: Chain
- sc: Single crochet
- inc: Increase (work 2 sc in the same stitch)
- st/sts: Stitch/stitches
- sl st: Slip stitch
- BLO: Back loop only (insert hook under the back loop of the stitch only)
Step-by-Step Pattern Instructions
This coaster is constructed in continuous rounds. Place a stitch marker in the first stitch of each round to keep track of your position.
Coaster Body
- Rnd 1: Start with a MR, work 6 sc into the ring. (6 sts)
- Rnd 2: Work 2 sc in each st around. (12 sts)
- Rnd 3: 1 sc in next st, inc in next st repeat from * to * 6 times. (18 sts)
- Rnd 4: 1 sc in each of the next 2 sts, inc in next st repeat from * to * 6 times. (24 sts)
- Rnd 5: 1 sc in each of the next 3 sts, inc in next st repeat from * to * 6 times. (30 sts)
- Rnd 6: 1 sc in each of the next 4 sts, inc in next st repeat from * to * 6 times. (36 sts)
- Rnd 7: Work 1 sc in the BLO of each st around. (36 sts)
- Rnd 8: Work 1 sc in each st around. (36 sts)
- Rnd 9: Sl st into the next st to finish, fasten off leaving a 6-inch tail.
Finishing
Thread your yarn needle with the remaining tail. Secure the yarn by weaving it through the back of the final stitches, moving in a circular motion to maintain the edge shape. Trim any excess yarn close to the fabric, ensuring the end is tucked securely inside the coaster body.
Care & Washing Instructions
- Machine wash in cold water on a gentle cycle to prevent shrinking or distortion.
- Lay the coaster flat on a towel to air dry, reshaping it into a perfect circle while damp.
- Avoid using fabric softener, as it reduces the absorbency of the cotton fibers.
Pro Tips & Common Mistakes to Avoid
Maintain consistent tension throughout the project to ensure your coaster lies flat rather than cupping or ruffling. If the piece starts to curve, your stitches might be too tight; if it ruffles, your stitches are likely too loose. Always use a stitch marker at the beginning of each round to avoid losing count during the increase sequence. Weave your ends in by catching the inner strands of the stitches so the knot remains invisible on both sides of the finished coaster. You can adjust the size by continuing the increase pattern in additional rounds, though note that larger coasters will require more yarn.
Frequently Asked Questions
Can I use a different yarn weight for this project?
You can use different weights, but it will change the final size of your coaster. A thinner yarn will result in a smaller coaster, while a bulkier yarn will produce a larger, thicker one.
Why is my coaster curling at the edges?
Curling usually happens when your tension is too tight or if the increase rate does not match the yarn weight. Ensure you are hitting every stitch count exactly as written.
Are these coasters safe for hot drinks?
If you use 100% cotton yarn, they are heat resistant and safe for most standard coffee mugs. Do not use synthetic fibers like polyester or acrylic if you plan to use them for very hot items.
Can I sell the coasters I make from this pattern?
You are welcome to sell finished items made from this pattern, but please credit the original design and use your own photographs for your shop listings.
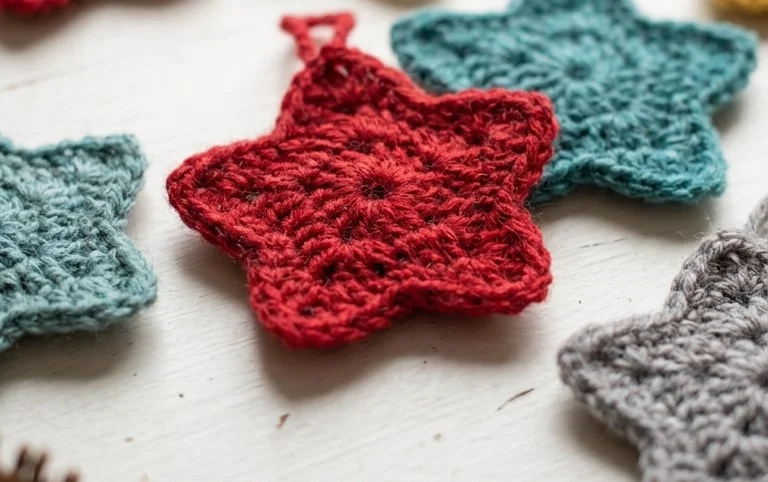
Your finished star coasters are ready to protect your tabletops and offer a cozy handmade feel to your home. Try working them in a variegated cotton yarn for a playful multi-colored look or scale up the hook size if you want a larger piece to use as a bowl mat. Snap a photo of your work and post it online so others can see your color choices. Browse the rest of our archives for more free home decor projects that use simple stitches and minimal materials.